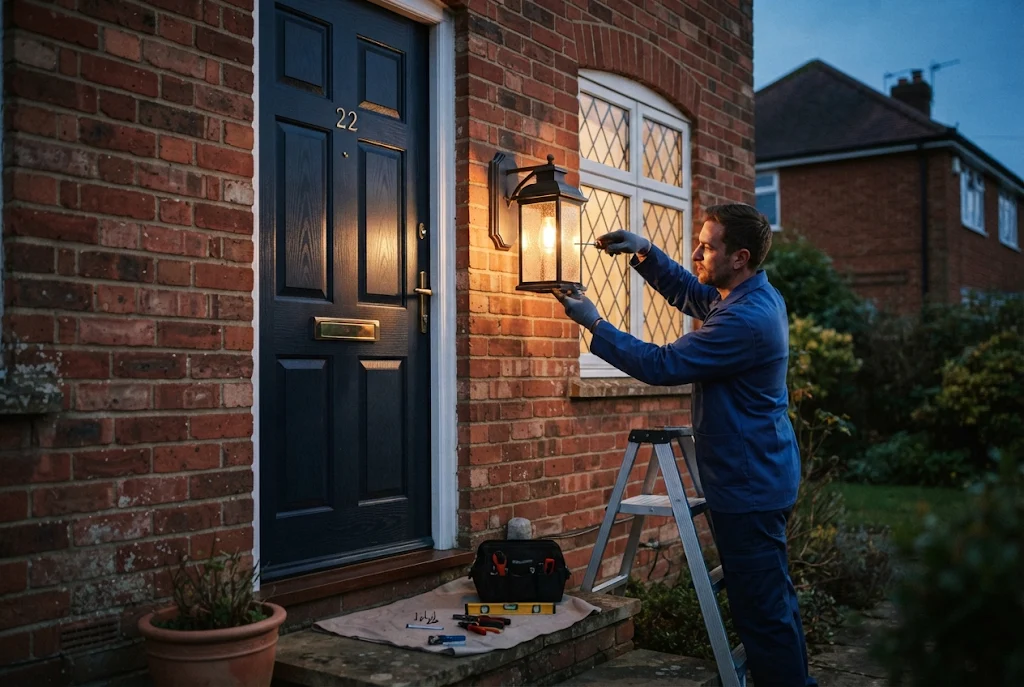
Fitting the Kichler 59060OZ is a fairly simple wall-mount job. You isolate the circuit, screw the mounting strap to the box, connect the earth, live and neutral, seal the canopy to the wall with silicone, then fit the glass and a bulb. If you’ve changed an outside light before, expect it to take about an hour.
UK buyers have one extra job to do first, though. This is a North American fitting, and US retailers list it at 120V. Before you drill anything, check the rating label and make sure the light is actually suitable for a 230V British supply. This guide covers that check, the fitting steps from Kichler’s own instruction sheet, and the mistakes that usually lead to a light full of rainwater.
The Kichler 59060OZ at a Glance
The 59060OZ is the 12-inch size in Kichler’s Mercer range of outdoor wall lights. It has an Olde Bronze finish and a clear seeded glass shade. On the Kichler Mercer product listing, the 12-inch model is listed at 7″ wide, 12″ high and 8.5″ deep. Here are those figures in metric, along with the other key specs:
| Spec | Imperial | Metric (approx.) |
|---|---|---|
| Width | 7 in | 17.8 cm |
| Height | 12 in | 30.5 cm |
| Depth from wall | 8.5 in | 21.6 cm |
| Backplate | 4.75 x 12 in | 12 x 30.5 cm |
| Weight | 5.73 lb | 2.6 kg |
| Socket | E26 (medium), 1 bulb | — |
| Max bulb wattage | 100 W | — |
| Listed voltage | 120 V | — |
Sources: Kichler’s product listing and spec sheet, plus US retailer listings as of November 2026. The 120V figure and the cETLus safety listing come from US and Canadian retailer pages, so check them against the label on your own unit.
Before Anything Else: The UK Voltage Question
The UK mains supply is 230V at 50Hz. North American homes run at 120V, and this light is designed and certified for that market. Its “wet location” listing is a North American rating. It isn’t the same as the IP rating (such as IP44 or IP65) that UK outdoor lights are sold with.
So what does that mean in practice? The socket, internal wiring and certification are all aimed at a 120V supply. A fitting that is safe at 120V isn’t automatically safe at 230V, and it won’t carry the UKCA or CE marking you’d normally look for on a light sold in Britain.
What to Check on Your Unit
Look for a rating sticker inside the canopy or near the socket. It should state the voltage, the maximum wattage and any safety marks. If the label says 120V only, don’t connect it directly to UK mains.
Your Realistic Options
| Situation | What to do |
|---|---|
| Label shows a 220–240V rating | An electrician can fit it in the normal way |
| Label shows 120V only | Don’t wire it straight to the mains. Ask an electrician whether it can be safely rewired with UK-rated parts, or choose a similar UK-rated lantern |
| You haven’t bought it yet | Ask the seller in writing whether it’s rated for 230V and carries UKCA or CE marking |
A step-down transformer is technically possible. In practice, fitting one outdoors for a single wall light is awkward and has to be weatherproof, so most people find a UK-rated alternative easier.
Can You Fit It Yourself? UK Rules in Brief
In England, swapping one light fitting for another is generally not notifiable building work. The IET’s Part P guidance gives “replacing a light fitting” as an example of minor work that you don’t have to report to building control. Running a brand-new circuit for outside lighting is a different matter and does need to be notified.
Not having to notify the work doesn’t mean the rules stop applying. The work still has to be safe and meet BS 7671, the UK wiring regulations. Wales has its own version of the regulations, and Scotland’s system is separate again, so check locally if you live outside England.
Our honest advice: if you’re replacing an existing outside light and you’re confident isolating a circuit and testing it’s dead, a careful DIY swap is reasonable. If there’s no light there now, the cable needs extending, or you’re unsure about the voltage, book a registered electrician. Outdoor faults are more dangerous because wet surfaces and metal fittings make a shock more likely.
What’s in the Box and What You’ll Need
Parts Supplied
Kichler’s instruction sheet for this fixture family (IS-59060) lists these parts:
- Mounting strap and mounting screws
- Canopy (the backplate)
- Strap mounting screws
- Two decorative knobs
- Spacer, glass shade and socket ring
- Socket
The outlet box isn’t included. It’s shown on the sheet, but you supply it yourself. The bulb isn’t included either.
Tools and Materials
- Voltage tester (a two-pole tester is better than a neon screwdriver)
- Screwdrivers, wire strippers and a small spirit level
- Wire connectors suitable for outdoor enclosures
- Exterior-grade clear silicone sealant
- A suitable weatherproof junction box behind the light
- A step ladder with someone to steady it
UK homes don’t normally have the US-style outlet box this strap is designed for. Your electrician may need to fit an enclosure that suits the strap’s screw spacing, so check this before the day of the job.
Step-by-Step Installation
These steps follow the order of Kichler’s instruction sheet, with UK notes added where practice differs.
1. Choose the Position
At about 30 cm tall, this is the small Mercer size. It suits a standard front door, a side gate or a garage door. A common rule of thumb is to mount the light slightly above eye level, roughly 1.6 to 1.8 metres to its centre. Some people use one light on each side of the door instead. Hold the light up to the wall before you commit, and look at it from the path.
2. Isolate the Power and Prove It’s Dead
Switch off the lighting circuit at the consumer unit. If you can, lock the breaker off or put a note on the board. Use your tester to confirm there’s no voltage at the old light, and test the tester on a known live source before and after. Flicking the wall switch off isn’t enough.
3. Prepare the Wall
Kichler says the mounting surface should be clean, dry and flat, and at least 1/4″ (about 6 mm) bigger than the canopy on every side. Fill any gap behind the canopy that’s wider than 3/16″ (about 5 mm). Uneven render and pebbledash are the usual problems in UK homes. A flat exterior mounting block gives the canopy a true surface to sit against.
4. Fit the Mounting Strap
Thread the two mounting screws into the strap from the box side. Then fix the strap to the box with the strap screws. Use your spirit level to keep it straight, because the canopy will follow whatever angle the strap is at.
5. Connect the Earth
The strap has a green earth screw. Depending on the strap version, you either wrap the supply earth around the screw or clamp it under a cupped washer. If the fitting has its own earth lead, join it to the supply earth with a connector. Never connect an earth to a live or neutral conductor.
6. Connect Live and Neutral
US wiring colours are different from British ones, and this is where most DIY mistakes happen:
| Conductor | US fixture lead | UK cable (current colours) | Older UK cable (pre-2006) |
|---|---|---|---|
| Live | Black | Brown | Red |
| Neutral | White | Blue | Black |
| Earth | Green or bare copper | Green/yellow | Green/yellow |
Watch out for the black wire. On the fixture, black is live. In older UK wiring, black is neutral. If your house has red and black cable, slow down and check every connection twice.
7. Mount and Seal the Canopy
Push the fitting onto the wall so the mounting screws come through the holes in the canopy. Make sure no wires are trapped behind it. Fit the two knobs and tighten them by hand. Then run a bead of silicone around the edge where the canopy meets the wall. Kichler says to seal all the way round so water can’t get into the box.
8. Fit the Glass, Spacer and Bulb
Lift the glass up over the socket and place the spacer inside it. Screw the socket ring onto the socket threads until the glass and spacer are held firmly. Don’t overtighten it, because glass and metal threads don’t forgive much. Finally, fit a bulb of the right type.
9. Test It Properly
Restore the power and check the light works. Let it run for a few minutes and check it again. Look at it after the first heavy shower too. Condensation or drips inside the glass usually mean the seal or a gap behind the canopy needs another look.
Choosing the Right Bulb
The socket is an E26 Edison screw, which is the US standard. UK shops mostly sell E27 bulbs, which look almost the same, but the two standards are designed for different voltages and markets. Use a bulb that matches the socket’s voltage rating and stays under the 100W maximum. A low-wattage LED runs cooler and puts less heat on the seals. The clear seeded glass shows the bulb, so a vintage-style filament LED usually looks better than a bare standard bulb.
Common Mistakes to Avoid
- Fitting it before checking the voltage label. This is the most expensive mistake to undo once the light is on the wall.
- Skipping the silicone or leaving gaps. Water gets in behind the canopy and corrodes the connections.
- Mixing up old UK colours. Red and black wiring catches people out on US fittings.
- Mounting on rough render without a flat block. The canopy can’t seal against an uneven surface.
- Using indoor wire connectors. Outdoor connections need parts that suit damp conditions.
Looking After It
Kichler’s general care advice for its fittings is to switch off the power first and clean them with a soft damp cloth only, because harsh cleaners can damage the finish. Once a year, check the silicone bead, clear out any spider webs inside the glass, and make sure the knobs are still tight.
Final Thoughts
The Kichler 59060OZ is easy to fit, and the mounting system is simple. For UK homes, though, the voltage check matters more than any fitting step. Look at the label first, use an electrician if the rating doesn’t suit 230V or if there isn’t an existing light point, and take your time over the wiring colours and the seal. If you get those three things right, the light should stay dry and work properly for years.
FAQ
Is the Kichler 59060OZ suitable for UK mains electricity?
US retailers list it at 120V, while UK mains runs at 230V. Check the label on your unit. If it shows 120V only, don’t wire it directly to UK mains.
Do I need an electrician to install it?
Replacing an existing light isn’t usually notifiable in England, but it still has to be done safely. Use an electrician if there’s a new circuit involved, you’re unsure about the voltage, or you’re not confident testing whether a circuit is dead.
What bulb does it take?
It has a single E26 medium screw socket with a 100W maximum, and the bulb isn’t included. An LED bulb matched to the socket’s voltage rating is the sensible choice.
Is it waterproof?
It’s sold with a US wet location rating for exposed outdoor spots. It doesn’t come with a UK IP rating, and it only stays watertight if the canopy is sealed to the wall as Kichler instructs.
How big is it?
It’s about 17.8 cm wide, 30.5 cm tall and 21.6 cm deep, and weighs about 2.6 kg.