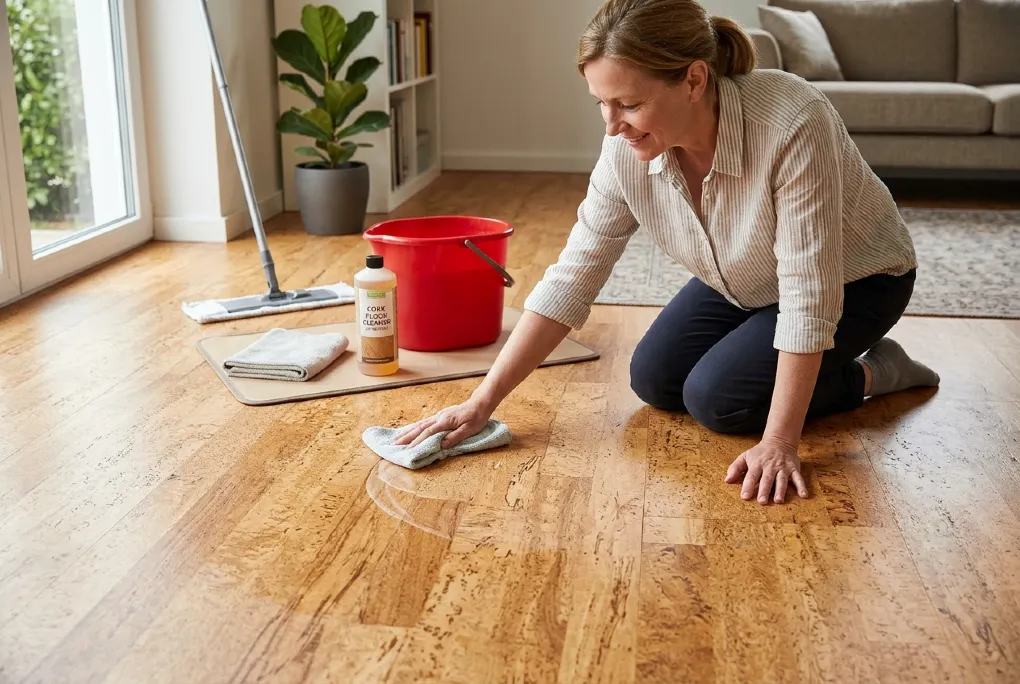
Cork is a forgiving floor to live on. It’s soft, quiet and warm. It’s much less forgiving when cleaned the wrong way. Too much water, the wrong cleaner or a steam mop can dull the protective finish, and once the finish wears through, the cork underneath starts absorbing moisture and stains.
Here’s the short answer. To clean cork flooring safely:
- Remove grit first with a soft broom or a vacuum on the hard-floor setting.
- Damp-mop with a well-wrung microfiber mop and a pH-neutral cleaner made for cork or wood floors.
- Dry any wet spots right away so no water sits on the surface or in the seams.
- Skip steam mops, soaking, bleach, ammonia, abrasive pads and oil soaps.
The rest of this guide covers the details: identifying your floor’s finish, handling stains, deep cleaning without flooding the floor, and the habits that keep the finish intact for years.
Start by Identifying Your Cork Floor’s Finish
The finish is what you’re actually cleaning, so it’s worth knowing what’s on your floor. Most cork floors sold in the US, Canada and Australia today come factory-finished, but older and custom installations vary.
| Finish type | How to recognize it | Cleaning approach |
|---|---|---|
| Polyurethane or acrylic (most common) | Slight sheen; water beads up on the surface | Damp-mop with a pH-neutral cleaner |
| Wax or oil finish | Matte, natural feel; may darken when wet | Minimal water; use the maker’s recommended care products |
| Unsealed / unfinished | Very matte; water soaks in quickly | Mostly dry methods; reseal as soon as practical |
| Cork with a vinyl wear layer | Looks like cork but feels smooth and plastic-like | Follow vinyl-style care in the manufacturer’s guide |
A quick test: put a few drops of water in a low-traffic spot and wait a couple of minutes. If the water beads, the finish is doing its job. If it darkens the cork or disappears, the area is unsealed or the finish has worn thin.
The most reliable source is your flooring manufacturer’s care sheet. Finishes differ from brand to brand, and using an unapproved product can affect your warranty.
What You’ll Need
You don’t need specialist equipment. A basic kit covers almost everything:
- Soft-bristle broom or a vacuum with a soft floor brush (beater bar switched off)
- Flat microfiber mop with removable pads
- pH-neutral floor cleaner labeled safe for cork, wood or “finished floors”
- Spray bottle for misting cleaner instead of pouring it
- Dry microfiber cloths or a spare dry mop pad
- Felt furniture pads and a doormat for prevention
A flat microfiber mop is worth buying if you don’t have one. It holds far less water than a string mop, which is the biggest single factor in protecting cork.
How to Clean Cork Flooring: The Routine Method
This is the clean you’ll do most often, usually weekly in busy homes and every week or two elsewhere.
- Clear the grit. Sweep or vacuum first, paying attention to entryways and the kitchen. Sand and small stones act like sandpaper underfoot and cause most of the fine scratches that dull a cork finish.
- Mix or prepare your cleaner. Follow the dilution on the label. More cleaner isn’t better; extra product leaves a film that attracts dirt and looks streaky.
- Mist, don’t pour. Spray the cleaner lightly onto a small section of floor, or onto the mop pad itself. The floor should look barely damp, never wet.
- Mop with the grain of the room. Work in small sections, moving toward the door so you don’t walk over cleaned areas.
- Swap pads when they look dirty. A grimy pad just spreads dirt around. Keeping two or three pads on hand makes this easy.
- Dry as you go. If any area still looks wet after a minute or so, wipe it with a dry cloth. Pay particular attention to seams between planks or tiles, where water can wick into the edges.
On a sealed floor, that’s all you need for routine care.
Deep Cleaning Without Soaking the Floor
Every month or two, or after a messy event like a party or a muddy week, give high-traffic areas a more thorough clean. “Deep” here means more attention, not more water.
- Go section by section. Clean about one square meter (roughly 10 square feet) at a time, then dry it before moving on.
- Use a soft brush for grime. For built-up dirt in textured cork, dip a soft-bristle brush in diluted cleaner, shake off the excess, and scrub gently. Wipe and dry immediately.
- Hand-clean the edges. Baseboards and corners collect dust that mops miss. A damp microfiber cloth works better there.
- Remove old cleaner film. If the floor looks hazy or feels sticky, product has built up. Wipe it with a cloth dampened in plain water, then dry it. Check whether your cleaner’s manufacturer sells a residue remover designed for finished floors.
Spot-Cleaning Common Stains
Spills are where cork finishes take the most damage, mainly because liquids get left too long. Blot first, then treat. Always test any treatment in a hidden spot.
| Stain | What to do |
|---|---|
| Food, juice, coffee | Blot right away, wipe with diluted pH-neutral cleaner, then dry |
| Red wine | Blot (don’t rub), clean with diluted cleaner; repeat rather than scrubbing hard |
| Pet accidents | Blot thoroughly, then use an enzyme cleaner labeled safe for finished floors; dry well |
| Ink or marker | Dab lightly with a cotton swab and a little isopropyl alcohol, then wipe with water and dry |
| Grease or cooking oil | Wipe with diluted cleaner; a drop of mild dish soap in water can help, rinse with a damp cloth after |
| Chewing gum or wax | Harden it with ice in a plastic bag, then lift it with a plastic scraper or old card |
| Scuff marks | Buff with a dry microfiber cloth; for stubborn scuffs, a clean tennis ball rubbed gently often works |
If a stain has gone gray or black under the surface, water has likely got through the finish into the cork. That’s a repair job for spot refinishing, not a cleaning job.
What Damages a Cork Finish
Most cork floor damage comes from a short list of common mistakes. Knowing why each one is a problem makes the rules easier to remember.
- Steam mops. Heat and moisture together can soften the finish and push water into seams. Cork manufacturers, including Cancork’s care guidance, advise against steam cleaning altogether.
- Wet mopping or standing water. Cork is porous. Water that gets past the finish can cause swelling, curling at the edges and dark stains.
- Vinegar. Advice online is mixed. Vinegar is acidic, and repeated use can wear down some finishes over time. If you use it at all, keep it heavily diluted and occasional, and check your manufacturer’s guidance first. A cork-safe cleaner is the lower-risk choice.
- Bleach, ammonia and harsh all-purpose sprays. These can strip or cloud a finish and may discolor the cork.
- Oil soaps and “shine” products. They leave a residue that builds up, can make the floor slippery, and can make future recoating harder because new finish won’t bond well over it.
- Abrasive tools. Scouring pads, melamine “magic” sponges and stiff brushes leave fine scratches in the finish.
- Beater-bar vacuums. Rotating bristles can scuff the surface. Use the hard-floor setting or a soft brush head.
- Tape and rubber-backed mats. Tape can lift the finish when removed, and some rubber backings can discolor cork. Choose mats labeled safe for hardwood or natural floors.
Habits That Keep the Finish Lasting Longer
Good prevention means less cleaning and fewer repairs.
- Use doormats at every entrance. Catching grit at the door is the easiest way to prevent scratches.
- Put felt pads under furniture. Cork is soft, and chair legs dragged across it leave dents and scuffs. Lift furniture instead of sliding it.
- Manage indoor humidity. Cork, like wood, expands and contracts with moisture. Very dry air can lead to small surface cracks, and very damp air can cause curling. Many flooring guides suggest keeping humidity around 30–60%; check your manufacturer’s recommendation.
- Limit direct sunlight. Strong sun can fade or yellow cork over time. Blinds or UV-filtering film help in sunny rooms.
- Clean winter grit quickly. In colder regions, road salt and grit tracked indoors are abrasive. Sweep entryways more often during winter months.
When Cleaning Isn’t Enough: Signs It’s Time to Recoat
Even with careful cleaning, finishes wear, especially in hallways, kitchens and in front of sofas. Look for:
- Water no longer beading in traffic areas
- Dull, gray or rough patches that cleaning doesn’t improve
- Stains that soak in quickly instead of wiping off
Many cork floors can be lightly abraded and recoated rather than replaced. Recoating intervals vary widely with the product and how much traffic the floor gets, so check your manufacturer’s guidance or ask a flooring professional before choosing a finish. A floor with a vinyl wear layer usually can’t be recoated in the same way.
The Takeaway
Caring for cork comes down to dry grit removal, very little water and a pH-neutral cleaner, followed by drying. If you know your floor’s finish, avoid steam and harsh chemicals, and deal with spills quickly, you can clean cork flooring for years without wearing through the protective layer. Start by finding your manufacturer’s care sheet. It’s the best guide to which products your specific floor can handle.
Frequently Asked Questions
How often should I clean cork floors?
Sweep or vacuum high-traffic areas a few times a week, damp-mop weekly or every other week, and deep-clean busy areas every one to three months.
Can I use a Swiffer-style wet mop on cork?
Light pads are generally fine on sealed cork, provided the cleaning liquid is pH-neutral and the floor doesn’t stay wet. Check the product label and your floor’s care guide.
Is a robot vacuum safe for cork floors?
Usually, yes, for vacuuming. Make sure it uses soft brushes and doesn’t have a stiff beater bar. If it mops too, set it to the lowest water level.
Can I clean unsealed cork the same way?
No. Unsealed cork absorbs moisture, so stick mostly to dry methods and spot-clean with a barely damp cloth. Sealing it is the best long-term protection.