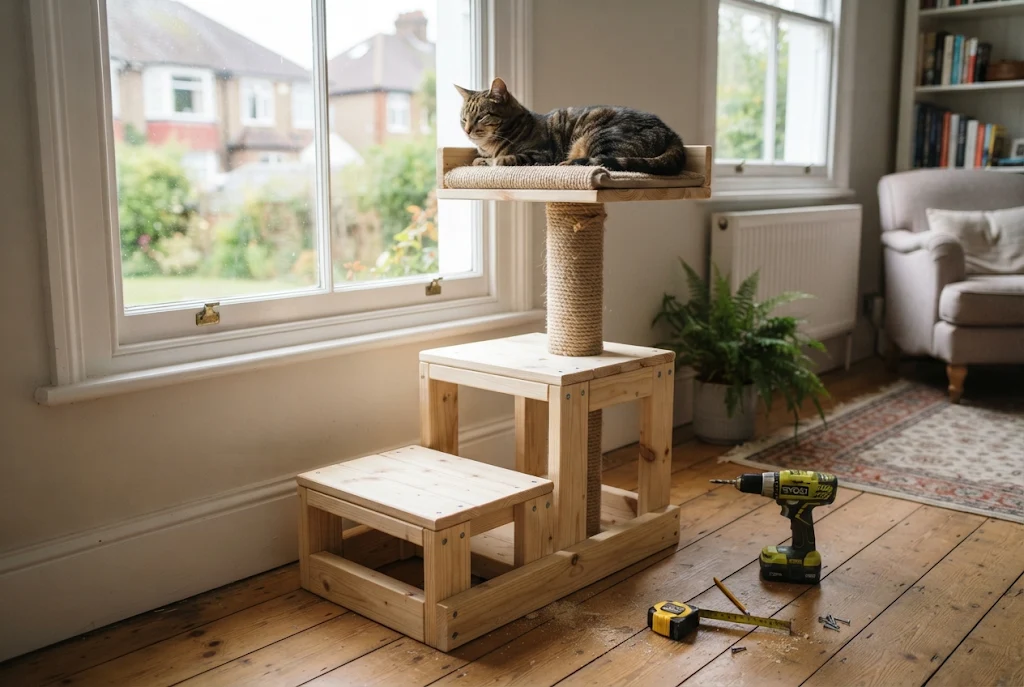
You can build a sturdy DIY cat tree in a weekend using a plywood base, one thick timber post, two or three platforms and a reel of sisal rope. The real skill isn’t the carpentry. It’s getting the proportions right: a base wide and heavy enough that the tree never rocks, a scratching post tall enough for a full stretch, and platforms spaced so your cat can step up without straining.
This guide takes you through a simple three-level design, about 120 cm tall, that suits most adult cats. It covers materials, measurements, assembly, safety checks and the small details that decide whether your cat actually uses it or treats it as furniture to ignore.
Why a Homemade Cat Tree Is Worth the Effort
Cats need two things a tree gives them: somewhere to scratch and somewhere high to rest. The Scottish Government’s code of practice for cat welfare says a scratching post should be high enough for a cat to exercise at full body stretch and stable enough that it won’t fall over when used. Plenty of shop-bought towers fail one of those tests, with short posts broken up by platforms or narrow bases that sway.
Building your own lets you fix both. You choose the post height, the base weight and the layout to suit your cat, your room and the gap you’ve got by the window.
That matters more for indoor cats. UK charity Blue Cross points out that indoor cats need safe high spaces they can reach without risk of falling, ideally with scratching posts in more than one spot.
What You’ll Need
Materials
| Part | Suggested material | Size for a 120 cm tree |
|---|---|---|
| Base | 18 mm plywood | 60 × 60 cm |
| Main post | Planed softwood, untreated | 75 × 75 mm, about 110 cm long |
| Platforms (×2) | 18 mm plywood | 40 × 40 cm each |
| Top perch | 18 mm plywood | 45 × 45 cm |
| Platform supports | Softwood offcuts or metal angle brackets | 4–6 pieces |
| Scratching surface | Natural sisal rope, 8–10 mm | 40–45 m (see below) |
| Platform covering | Cut-pile carpet offcuts or thick felt | Enough for all platforms |
| Fixings | Wood screws (various), wood glue, staples | — |
| Anti-tip strap | Furniture wall strap kit | 1 |
Tools
- Drill/driver with wood bits and a countersink bit
- Jigsaw or handsaw (many DIY stores will cut sheet material to size for you)
- Staple gun with 10–14 mm staples
- Tape measure, pencil and set square
- Sandpaper (120 grit) and clamps
How much sisal rope? This is the number most guides skip. A 75 mm square post has a perimeter of 30 cm, so each turn uses about 30 cm of rope. With 8 mm rope you get roughly 125 turns per metre of post, which works out at around 37–40 m of rope for every metre you wrap. Buy a little extra so you don’t run short at the top. Thicker 10 mm rope needs about 30 m per metre.
Plan Your Cat Tree Before You Cut Anything
Ten minutes with a tape measure saves a wobbly result. It helps to sketch the cat tree on paper first, marking each platform height and which side it sticks out from. Think about these four things before you cut.
Height of the scratching section. Stand your cat on its back legs (a treat held high works) and measure from the floor to its outstretched front paws. Your uninterrupted wrapped section should be at least that long. For most adult cats, that’s somewhere around 80–90 cm. Keep the first platform above the top of the sisal, not halfway up it.
Base footprint. A rule of thumb many builders use is a base at least half as wide as the tree is tall. For 120 cm, 60 cm works. Taller than that, and you should plan to anchor the top to a wall.
Platform spacing. Leave about 30–40 cm between levels so each jump is an easy step rather than a leap. Older cats or kittens will appreciate the lower end of that range.
Location. Decide where it’ll stand before you build. A spot near a window, or beside the sofa where your cat already scratches, gets used far more than a spare corner of the landing.
How to Build a DIY Cat Tree Step by Step
Step 1: Cut and sand the pieces
Cut the base, platforms and top perch to size. Round the corners slightly with sandpaper and smooth every edge, because sharp ply corners catch fur and the occasional shin. Cut the post square at both ends so it stands perfectly upright.
Step 2: Wrap the post before assembly
It’s much easier to wrap the post while it’s loose on the workbench. Staple one end of the rope to the bottom of the post, add a thin line of wood glue, then wind the rope tightly, pushing each turn down against the last so there are no gaps.
Leave the top 20 cm of the post bare where the first platform will sit. Finish by stapling the end on the underside, where claws won’t reach it, and cut off any loose fibres.
Step 3: Fix the post to the base
Mark the centre of the base. Drill four countersunk pilot holes through the base from underneath, apply glue to the end of the post, then drive four long wood screws (around 80–100 mm) up into it. Check it’s vertical with a set square before the glue sets.
If you’d rather not rely on screws into end grain alone, add metal angle brackets around the bottom of the post for extra strength.
Step 4: Cover the base and platforms
Wrap the carpet or felt over each platform and staple it on the underside. Pull it taut so there are no loose folds. Cover the base too, as it doubles as a horizontal scratch mat.
Step 5: Attach the platforms
Fix the first platform to the bare top section of the post using two angle brackets or timber cleats screwed beneath it. Screw down through the centre of the top perch into the end of the post as well.
For the second platform, offset it to one side using a short arm of timber screwed to the post. This creates a staircase effect, so your cat has a clear route up and down rather than having to squeeze past a platform directly overhead.
Step 6: Add the comfort details
A raised lip around the top perch (a 3–4 cm batten round the edge) makes it feel secure for sleeping. You can also add a dangling toy on a short cord, kept short so it can’t wrap around a paw or neck.
Step 7: Test it, then anchor it
Push firmly on the top platform from every side, the way a heavy cat landing at speed would. If the cat tree rocks at all, add weight to the base (a second layer of ply works) or widen it. Then fix the top of the tree to a wall stud or a solid wall with a furniture anti-tip strap. It’s a small job that prevents a nasty accident if your cat launches itself at the top perch.
Sisal, Carpet or Cardboard: Which Surface Works Best?
| Surface | Best for | Lasts | Watch out for |
|---|---|---|---|
| Sisal rope | Main scratching post | Long, easy to rewrap | Loose ends if not stapled well |
| Cut-pile carpet | Platforms and base | Medium | Loop-pile carpet can snag claws |
| Corrugated cardboard | Horizontal scratchers | Short, cheap to replace | Gets messy quickly |
| Felt or fleece | Sleeping perches | Long | Not a scratching surface |
Sisal is the go-to for posts because it shreds rather than snags. If your cat already scratches the doormat or the carpet, a carpeted section on the base gives it something familiar to start with.
One practical point: sisal wears out first, usually at the height where your cat hits it hardest. Because you built the cat tree yourself, you can unpick and rewrap just that worn band with a few metres of fresh rope instead of replacing the whole thing.
Safety Checks Before Your Cat Moves In
Run through this list once the glue has cured overnight.
- No wobble. The tree shouldn’t move when pushed hard at the top.
- No sharp points. Run your hand over every surface. Hammer flat any staples sticking up and countersink all screw heads.
- Untreated wood only. Avoid pressure-treated garden timber, and don’t paint or varnish anything unless the product is clearly labelled as safe for pets once dry.
- No long cords or loose loops. Toys should hang on short, sturdy cord.
- Safe glue use. Use glue sparingly and let it dry fully before your cat gets near it.
- An easy way down. Every high platform should have a lower step beside it. Cats climb up more easily than they get down.
Mistakes That Make Cats Ignore a Homemade Tree
When a cat tree sits unused, the cause is usually practical, not a fussy cat.
- Scratching post too short. If your cat can’t stretch fully, it’ll go back to the sofa arm.
- A tree that sways. Even a slight wobble puts many cats off for good.
- Hidden in a quiet room. Cats like to be near the action, so put it where the family spends time.
- Strong smells. Fresh varnish or glue can put a cat off. Let the tree air for a day or two.
- Forcing it. Don’t plonk your cat on the top. Scatter a few treats on the lower platform, or drag a wand toy up the post, and let it explore in its own time.
Ideas to Adapt the Design
A multi-cat version
If you’ve got two or more cats, widen the base to 70 × 70 cm and add a second post at the opposite corner. A cat tree with two posts gives each cat its own route up, so one cat can’t block the only way down. Make the top perches big enough for an adult to stretch out, roughly 45 cm or more.
A wall-anchored cat tower
Short on floor space? Use a narrower 45 × 45 cm base and fix the post directly to the wall with two brackets. This tree cat tower style takes up very little room and is often steadier than a freestanding version, as long as you screw into studs or use proper wall plugs.
A festive cat Christmas tree
For a seasonal twist, build a cone-shaped cat Christmas tree. Stack three platforms that get smaller towards the top (say 50 cm, 40 cm and 30 cm) on the same central post, wrap the post in green sisal, and skip the tinsel and glass baubles entirely. It gives your cat something of its own to climb in December, which may draw attention away from the real tree.
Ready to Build?
A good DIY cat tree comes down to three numbers: a scratching post as tall as your cat’s full stretch, a base at least half the tree’s height, and platforms 30–40 cm apart. Get those right, build it solidly, strap it to the wall and put it somewhere your cat already likes to be. Measure your cat this evening, and you’ll have everything you need to draw up a shopping list.
Frequently Asked Questions
Is it cheaper to make a cat tree than to buy one?
Often, yes, especially if you already have tools and offcuts. The bigger advantage is quality: you can build a heavier, taller post than many budget towers offer. Check current timber and sisal prices locally, as they vary.
What wood is safe for a cat tree?
Plain, untreated softwood and standard plywood are the usual choices. Avoid pressure-treated timber and any finish not labelled as pet-safe.
How tall should a homemade cat tree be?
For most homes, 100–150 cm works well. Anything taller should be anchored to the wall, and the scratching section should match your cat’s full stretch.
Can I use old carpet on a cat tree?
Yes, as long as it’s clean and cut-pile. Avoid loop-pile carpet, which can catch claws.
How do I clean a homemade cat tree?
Vacuum the platforms and post weekly with a brush attachment. Spot-clean carpet with a mild, unscented cleaner and let the cat tree dry fully before your cat uses it again.